To better prepare for this technical exercise please read The New Color
Before the in-class TE please have posted the following under Critical Responses:
- What are Charlotte Cotton’s thoughts on the possibilities of the return of black-and-white and why photographers might want to consider their choices in tools and materials with greater scrutiny?
- In consideration of your own initial investigation and exploration into the visual language of color, how do you see your own photographic practice proceeding? Will you continue to work in color or do you see yourself returning to black-and-white and why?
- As you contemplate what you’ll photograph and how you will make work in the future, what is dictating this choice in working in color, black-and-white, or both and why? (Content and subject matter, accessibility to particular tools and materials, etc…)
A color photograph can have over 16 million different colors. A grayscale image has only 256 shades of gray. You must translate those colors to grayscale in a way that gives aesthetically pleasing results. Fortunately there is more than one way to do a conversion. If one method doesn’t work on a particular photograph there are others that you can try.
Selecting a Conversion Method
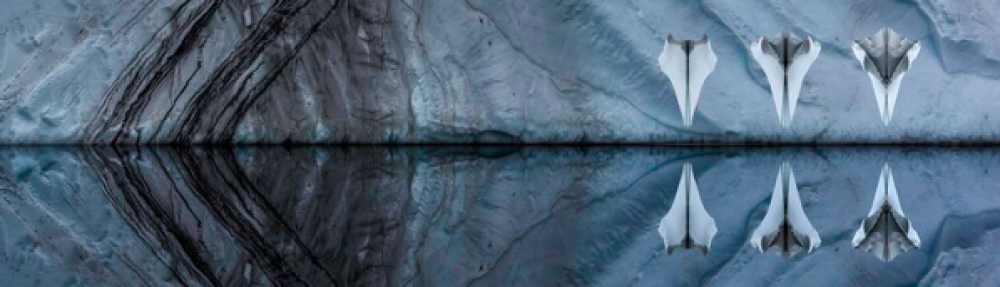
All conversion methods work by taking the colors in a photograph and converting them to shades of gray. However, your choice of conversion method will affect the look of your final image. As you can see from the photograph to the below, different conversion methods can lead to very different results. There are two categories of conversion methods.
Luminosity Based conversion methods assign a shade of gray based only on the color’s brightness or luminosity. This is similar to the way black and white film captures only the scene’s brightness. Generally, Luminosity methods work best for photographs with high contrast.
Color Altering conversion methods alters the colors in your photograph before converting it to grayscale. By doing this, color altering methods translate color contrast into luminosity contrast. Color altering methods work great on images with high color contrast. Color Altering methods also allow you to simulate filter effects and film response.

Select ONE image for this exercise.
Desaturation Method
Open the file you want to convert and add an Adjust layer. Click on Hue/Saturation. On the Dialog box, decrease the saturation value to -100%. Click Ok and you are done.
The Gradient Map
- Open a color image in Photoshop
- Press the letter D on you keyboard to set the background/foreground colors to the defaults, black and white.
- Under the Layer menu, choose New Adjustment Layer>Gradient Map. Click OK on the next two dialog boxes to apply the Gradient Map layer.
The following conversions are from Darren Rowse
Channel Mixer
Open an image and then add a Channel Mixer adjustment layer.
Select Monochrome and adjust the percentages for RGB. Again, I usually start with 70%, 30%, 5%
Adjust the percentages until the photo looks good, don’t worry about great, we’ll get to that in a moment. You can also adjust the constant percentage to lighten or darken the photo. In this case I darkened the photo by setting the constant to -2%. When done, click Ok
Now, duplicate that layer twice. If you flatten the photo, just drag the layer to the Create a New Layer Icon on the Layers window. If you prefer to not flatten, you’ll need to duplicate both the above layers. The easiest way to do this is by selecting both the adjustment layer and the photo and dragging them to the Create a New Layer Icon on the Layers window.
Click on the one of the duplicated photo layers. Change the Screen Mode to Color Burn and reduce the opacity to something between 5% and 15% (personal preference).
Click on the other duplicated layer Change the Screen Mode to Soft Light and reduce the opacity to something between 5% and 30% (personal preference).
Now the Photo should have more depth and not look as flat. You can adjust each of these layers based on the photo of your personal taste.
One thing I find useful is at the end to add a contrast layer, this will darken the darks and lighten the white. This is optional step.
LAB Method
Open the file you want to convert. Convert to Lab Color by going to Image>Mode>Lab Color. From the channel window (if it is not open, go to Windows>Channels) and select the Lightness Channel.
Select all by either going to the menu Edit>Select All or Ctrl-A or Cmd-A and copy the selection either through the menu or Ctrl-C or Cmd-C. Then convert back to RGB Mode, go to the menu Mode>RGB.
Go back to the Channel Window and select the Red channel. Paste either through the menu or Ctrl-V or Cmd-V.
Select the Green Channel and paste either through the menu or Ctrl-V or Cmd-V.
Select the Blue Channel and paste either through the menu or Ctrl-V or Cmd-V.
Reselect the top channel to make all the color channels visible again and you are done.
If for you feel the photo looks flat, you can use the duplicate layer method mentioned above. Just duplicate the main layer twice and follow these steps above. If the photo is too dark, add an Levels Adjustment layer and lighten the photo.
To lighten the photo, I adjusted the center value and increased it to 1.20. The original value was 1.0. Too darken the photo, decrease the center number. To lighten, increase the center number
Lab Mode Lightness Channel Conversion Method
This method uses the lightness channel of the Lab colorspace to do the black and white conversion.
Warning: This method changes the color mode of your image to Lab. Be sure to change the mode back to RGB. Otherwise some enhancements, such as toning, may not work
- Convert the picture to Lab mode by selecting: Image > Mode > Lab Color
- Select the lightness channel and deselect the other channels
- Convert the image to grayscale by selecting: Mode > Grayscale
- Convert the picture back to RGB mode by selecting: Image > Mode > RGB Color
Grayscale Mode Conversion Method
- Select Image > Mode > Grayscale
- Select Yes when asked to discard color information
Standard Channel Mixer Method
- Create a new channel mixer layer by selecting Layer > New Adjustment Layer > Channel mixer.
- In the Channel Mixer window check the “Monochrome” checkbox
- Move the red, green, and blue sliders until you get the look you want.
Separate Channel Layer Method
This method separates each channel into its own layer.
- Select the Channel Pallet
- From the channel pallet menu select “Split Channels”. This will create three separate files called “Filename_R”, “Filename_G”, and “Filename_B”.
- Select Windows -> Arrange -> Horizontal so you can see all three files.
- For all three files select the Layers pallet
- Select the “Untitl_B” file
- Right click the background layer and select Layer from Background. Name this layer “Blue”.
- Drag the background layer from “Filename_G” into “Filename_B”
- Rename this layer “Green”.
- Drag the background layer from “Filename_R” into “Filename_B”
- Rename this layer “Red”
- Right-click on the Background layer in “Filename_B” and select Delete Layer
- Adjust the opacity of the layers
Filename_B should now have three layers called “Red”, “Green”, and “Blue”. At this point you can close and discard Filename_R and Filenamel_G. The Blue layer forms the base and is set at 100% opacity. If you set the Blue layer at anything less than 100% your image will become translucent. Notice the checker-board pattern on the image.
To fix this do the following:
- Select Layer > New Fill Layer > Solid color… to create a solid color layer.
- In the Color Picker set the RGB values to 128, 128, 128
- Move the new layer to the bottom of the pile.
The middle gray layer forms a neutral background for the other layers. You can now adjust the red, green and blue layers.
Hue / Saturation Layer Conversion Method
This method is described on Russell Brown’s website, among others. I’ve never found out what this method is called. I’ll just call it “hue / saturation layer” method for lack of a better term.
Some prefer the hue layer method because it overcomes the two drawbacks of the channel mixer method: lack of fine control and the inability to hold the brightness steady. Some find the channel mixer easier to predict and control.
- Select Layer > New Adjustment Layer > Hue/Saturation Layer…
- Do not make any adjustments to this layer yet. Simply click on OK.
- Set the blend mode for this layer to Color.
- Create another Hue/Saturation layer and set the saturation slider to -100.
- Go back to the first Hue/Saturation layer and adjust the Hue slider.
- You can adjust individual colors by using the drop down list.
Post all images on your digital portfolio labeling each image. Post you original color images followed by each B/W conversion in the order of the exercise.
